Соединяем Codex и Blender через MCP. Этот промпт — отправная точка для остальных примеров.
Перед запуском установите Blender и аддон MCP, включите сервер в настройках аддона.
Codex↔Blender
Один промпт — чтобы начать
Читать промпт +
Полный текст · RU
Настрой подключение этого Codex к Blender на моём компьютере.
Blender установлен и открыт. Официальный аддон MCP от Blender Lab установлен и включён, сервер в его настройках запущен.
Установи внешнюю серверную часть из официального проекта https://projects.blender.org/lab/blender_mcp и зарегистрируй её в конфигурации MCP Codex.
Существующие подключения сохрани. Проверь, чтобы адрес и порт совпадали с настройками аддона Blender.
Документация: https://www.blender.org/lab/mcp-server/
После подключения вызови инструмент Blender через MCP и получи список объектов текущей сцены.
Саму сцену пока не изменяй. Если для появления инструментов нужен перезапуск Codex или новая задача, сообщи об этом.
02
Интерактивный 3D
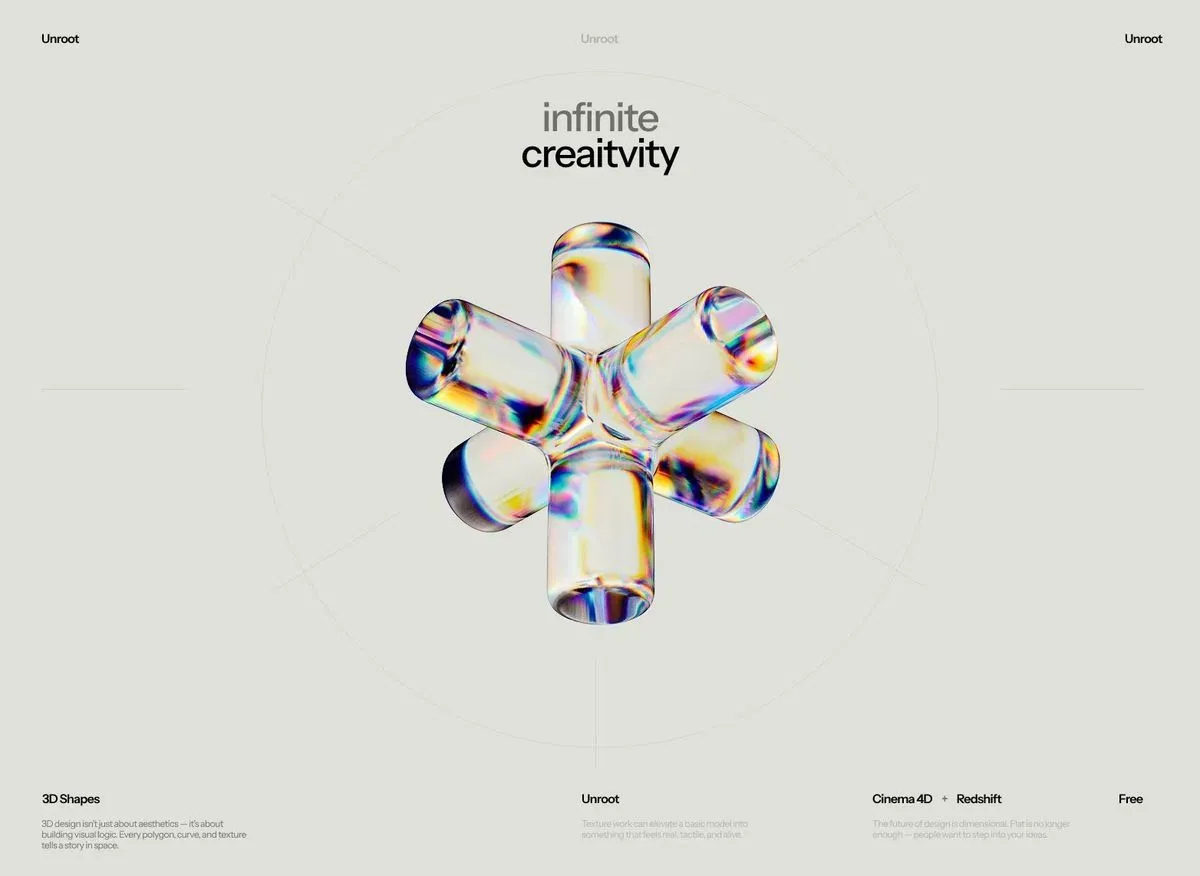
Жидкое стекло
Стеклянный крест с радужными преломлениями. Реагирует на курсор, вращается и мягко меняет форму.
Blender is running locally with the MCP addon connected. Build the 3D object there, verify it with a small Eevee render (not just the viewport), export GLB to ./public/model.glb. Then create the website project and embed the object. Deliver a running dev server (npm run dev) and tell me the URL.

GOAL: recreate the attached reference screen as closely as possible — layout, background, ring, typography feel, text blocks, and the glass cross object. Use the reference as the source of truth for the interface; don't invent your own design. Do not simplify to a plain glossy material.

STACK: Vite + React + @react-three/fiber + @react-three/drei + @react-three/postprocessing.

SHAPE (Blender): six glass capsules joined at the center in a 3D cross (±X, ±Y, ±Z), subtle fillet where they meet, smooth normals, ~20k tris.

MATERIAL: drei MeshTransmissionMaterial — transmission 1, thickness 1.5, roughness 0.05, ior 1.5, chromaticAberration 0.25 (rainbow dispersion is essential), anisotropicBlur 0.2, distortion 0.3, temporalDistortion 0.1, backside true, samples 10, resolution 512.

LIGHTING: drei Environment (studio-type HDRI, not visible in background), one warm key light and one cool rim light so highlights read as orange/blue like the reference. Page background is a flat light warm-gray like the reference; the object must visibly refract it.

MOTION — must feel alive at all times, never static:

1. Idle, always running: slow Y rotation (~0.15 rad/s) with gentle X/Z wobble, floating on a sine (amplitude 0.08). Continuously deform vertices with 3D simplex noise in a custom vertex shader (amplitude ~0.08, speed 0.3, low frequency) so the surface looks like slowly flowing liquid. Recompute normals so refraction stays correct.
2. Cursor: object tilts toward the mouse with damping (lerp 0.05). Vertices near the projected cursor bulge outward with smooth falloff.
3. Interaction: pointer drag rotates the object with inertia (decays over ~1.5s); click sends a soft ripple across the surface. No OrbitControls, no zoom, no pan.

POST: EffectComposer with restrained Bloom (threshold 0.9, intensity 0.4), light ChromaticAberration, subtle Noise (0.03), Vignette. Premium, not sci-fi.

PERFORMANCE: cap DPR at 1.5, transmission resolution 512 desktop / 256 mobile, pause rendering when the canvas is off-screen. Add a small FPS overlay for testing.

When done, take a screenshot of the running page, compare it to the reference, and fix the biggest visual differences before reporting back.
03
Интерактивный 3D
Форма в движении
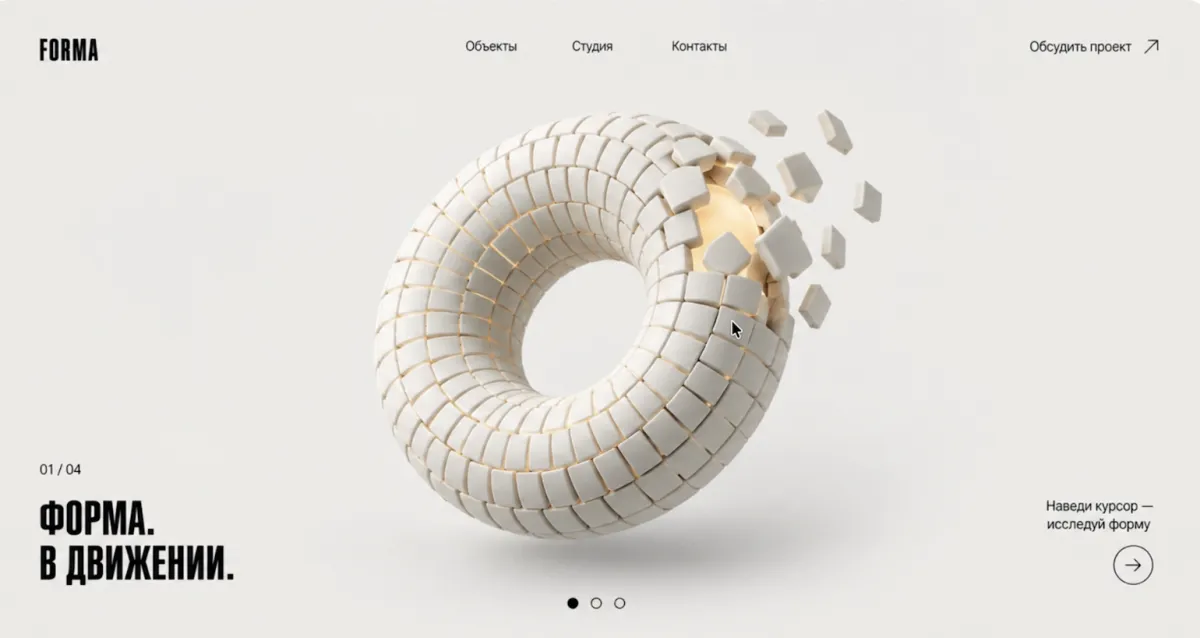
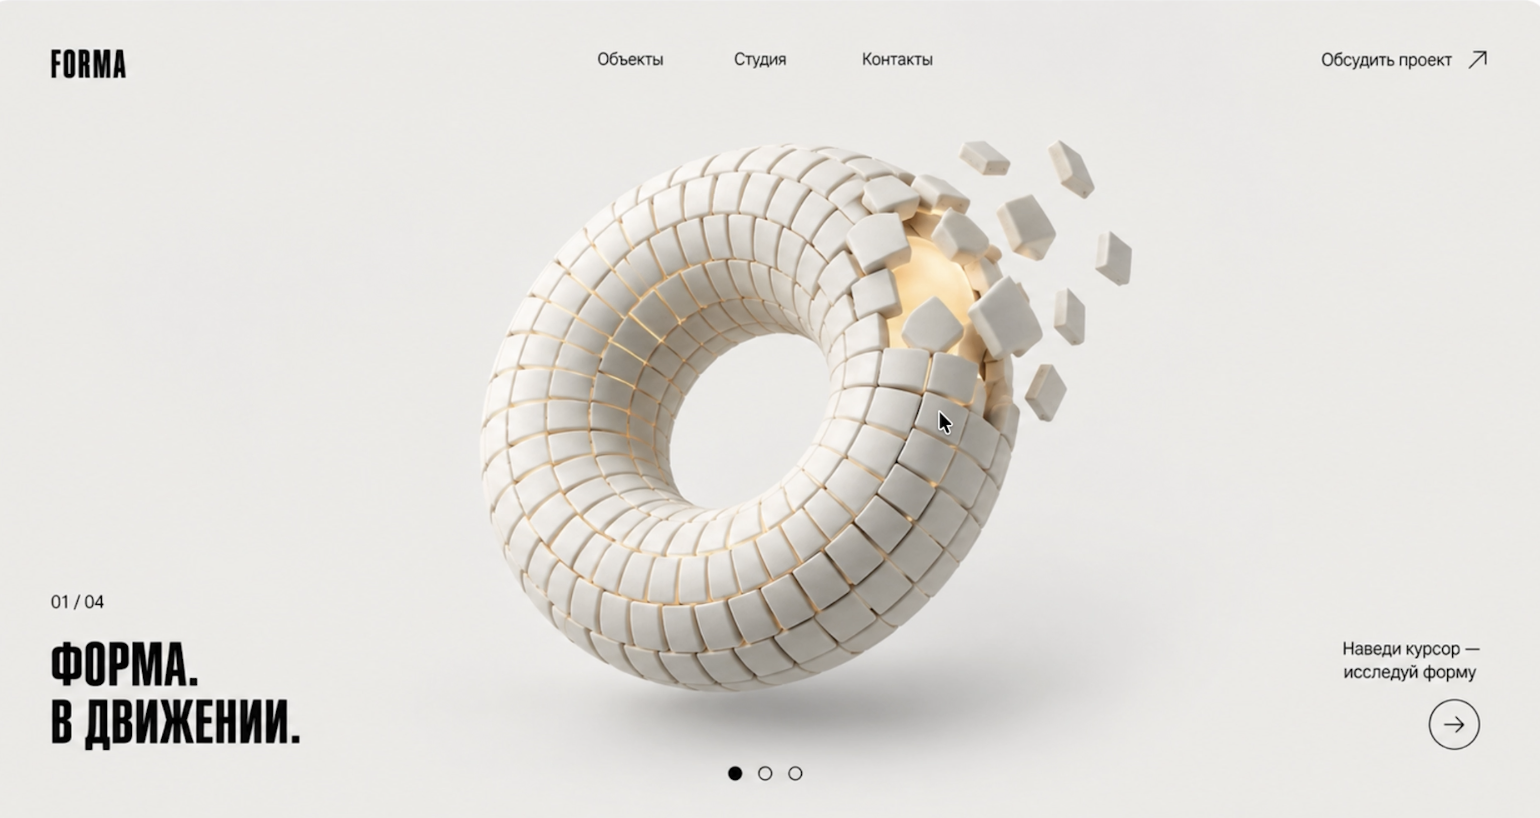
Керамические плитки разлетаются под курсором, открывая тёплое светящееся ядро, и собираются обратно.
New hero use case: a sculpture made of thousands of small white ceramic tiles on a torus. The cursor scatters the tiles around it and reveals a warm glowing core inside; when the cursor leaves, the tiles reassemble. Visual target: the attached FORMA mockup — match it as closely as possible: page layout, typography, colors, tile size and ring layout, the warm core glow. Mechanics reference: the attached dark tile sculpture.

STACK: Vite + React + @react-three/fiber + drei + postprocessing. Build the torus with tiles in Blender via MCP first (for a verification render and a GLB with per-tile home transforms baked as instance data), then reproduce it as a THREE.InstancedMesh on the web.

SHAPE: torus, major radius 1.4, tube radius 0.5, tilted like the mockup (~25° toward the camera, slightly rotated). ~8,000 rectangular tiles (~0.07×0.05×0.02) oriented along the surface normal, laid in neat rings along the tube with tiny gaps, like the mockup.

MATERIALS: tiles — matte white ceramic, per-tile color variation between #f6f4ef / #ece9e1 / #f9f7f2, roughness 0.5, clearcoat 0.3, slight sheen. Core: an inner torus (tube radius 0.4) with warm emissive material (#ffcf8a, emissiveIntensity 2.5). Faint warm light leaks through the gaps; where tiles scatter the core is exposed and its light floods the neighbouring tiles (add a point light that follows the cursor position inside the tube so the glow is real, not painted).

SCENE: page background warm light gray (#eeece7) with a very soft radial gradient, page in a large rounded card like the mockup; studio HDRI at low intensity, one soft key light, soft contact shadow under the torus. Bloom tuned so the core glows but white tiles never blow out.

MOTION:

- Idle: torus slowly rotates on its tilted axis (~0.1 rad/s) and floats; tiles breathe along the normal (noise, ±0.004); core pulses slowly.
- Cursor: raycast onto the torus. Tiles within radius R (~0.55) push outward along the normal plus away from the cursor with smoothstep falloff, random tumble rotation and slight spread; faster cursor = stronger scatter. Nothing outside R moves.
- Return: damped spring back to home position/rotation (stiffness ~6, damping ~0.85), soft overshoot, never snaps.
- Click: a pulse that scatters a wider ring once, core flashes brighter, then reassembly.
  All per-tile physics on the GPU (custom vertex shader on the InstancedMesh with home position/normal attributes and a small state texture), not a JS loop.

LAYOUT (follow the mockup, but make all website interface text English): logo "FORMA" top-left; nav "Objects · Studio · Contact" top-center; "Discuss a project ↗" top-right; index "01 / 04" and a bold two-line headline "FORM. / IN MOTION." bottom-left in a heavy condensed grotesk; caption "Move your cursor — / explore the form" and a circled arrow bottom-right; three dot indicators bottom-center. Text is dark near-black. The core glow is the only warm color on the page.

POST: Bloom (threshold 0.9, intensity 0.35), very light grain, faint vignette.

PERFORMANCE: 60 fps; DPR cap 1.5; tile count as a constant; pause off-screen; FPS overlay for testing.

Screenshot idle and scattered states, compare to the mockup side by side, fix the biggest differences, give me the URL.
04
Скролл и 3D
Музей в трёх сценах
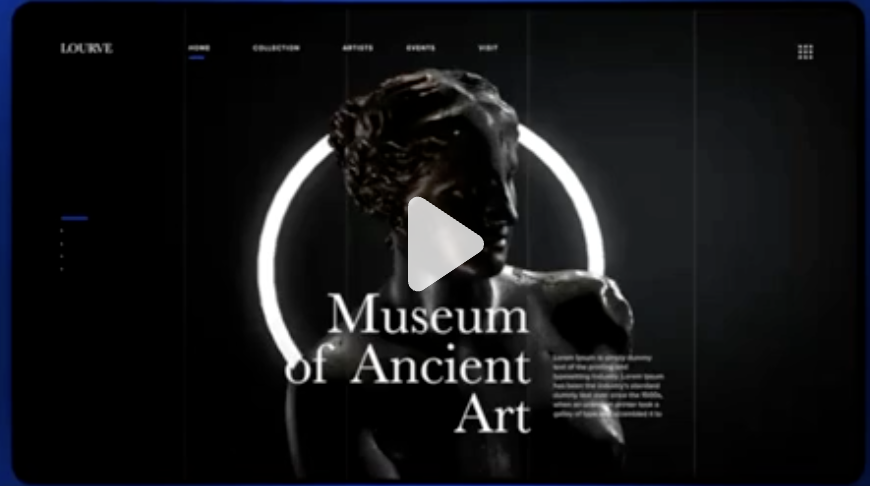
Классический бюст, бронза и световое кольцо. Композиция меняется по мере прокрутки страницы.
Build one standalone museum website with a Higgsfield-generated sculpture and a scroll-driven 3D scene. Start from a new project; no previous page or model is required. Deliver one finished version at the main route (/), with no baseline copies, versioned routes, or side-by-side comparison pages.

GOAL: match the three attached reference frames as closely as possible — layout, typography, dark background, fine vertical grid lines, glowing ring, bronze sculpture, and composition at each scroll state. Use the references as the source of truth. The large translucent play triangles are video-player overlays in the screenshots: do not reproduce them in the website. All website interface text must be in English.

STACK: Vite + React + @react-three/fiber + @react-three/drei + @react-three/postprocessing.

1. SOURCE IMAGE: generate one image with your image tool — a classical bust of a woman: head turned ~20° to her left, downward gaze, neck, shoulders and the top of a draped chest, fractured edge at the bottom. Front view, centered, plain neutral gray background, soft even studio lighting, no shadows on the background, no base, no props. Matte light-gray stone (not dark — the 3D model needs clean geometry cues; we'll darken the material in Three.js).

2. IMAGE → 3D via the Higgsfield plugin: model meshy_v7_image_to_3d, should_texture=false (we apply our own material), symmetry_mode=auto, target_polycount=120000, topology=triangle, should_remesh=true. One generation only — check the current cost first; the expected cost is about 25 credits, not a verified quote. Download the resulting GLB.

3. BLENDER CLEANUP via MCP: import the GLB, center it, orient it upright facing -Y, fix scale to ~1.8 m tall for the bust, remove floating fragments, smooth normals, light Decimate to ~80k tris, keep the fractured base edge. Render front and 3/4 with a warm rim light to verify. Export Draco-compressed GLB to ./public/statue.glb and configure the web loader to decode it.

4. PAGE AND SCENE: build the page around statue.glb. Use dark bronze material (#1a1512, metalness 0.65, roughness 0.3, clearcoat 0.2), a glowing ring as the visual key light with actual scene lighting to illuminate the sculpture, a warm front-left key and a cool back-right rim. Add restrained Bloom, depth of field focused on the face, Vignette and subtle Noise. Match the references' near-black rounded page panel, blue outer background, thin vertical rules, compact top navigation, left-side section indicators, large white serif headlines and small supporting text. Top navigation: Home, Collection, Artists, Events, Visit.

5. SCROLL CHOREOGRAPHY: use one persistent 3D canvas across three scroll sections. Smoothly interpolate camera framing, statue position/rotation and ring placement between these reference compositions:
   - Reference 1: a large central bust with a bright ring behind the head and shoulders; the headline "Museum of Ancient Art" overlaps the lower part of the sculpture, with a small supporting paragraph to the right.
   - Reference 2: move the bust to the right in a bowed side/three-quarter view, leaving the left column clear for "Alexandros of Antioch", "203 cm (80 in)" and "Island of Melos", each with a short supporting paragraph. Treat these as reference artwork labels, not measurements of the generated bust.
   - Reference 3: bring the sculpture closer so the head and torso dominate the center and right, with the ring partly cropped at the top; place "Discovery of a mutilated masterpiece" on the left and two small text columns at the bottom right.
   Keep transitions continuous, without model reloads or abrupt jumps. Tune camera distance, statue offsets and face focus for the generated bust's proportions.

6. INTERACTION: add subtle damped cursor-driven tilt and pointer-drag rotation with inertia. Blend these offsets with the scroll-driven pose so the reference compositions remain recognizable; gently return to the section pose after interaction. Do not add zoom or pan controls. Keep navigation and page scrolling usable on touch devices.

7. VERIFICATION AND DELIVERY: run the website with npm run dev. Take screenshots of all three scroll states, compare each with its corresponding reference frame, and fix the biggest visual differences. Deliver the single running page URL.
05
Персонаж и 3D
Персонаж с характером
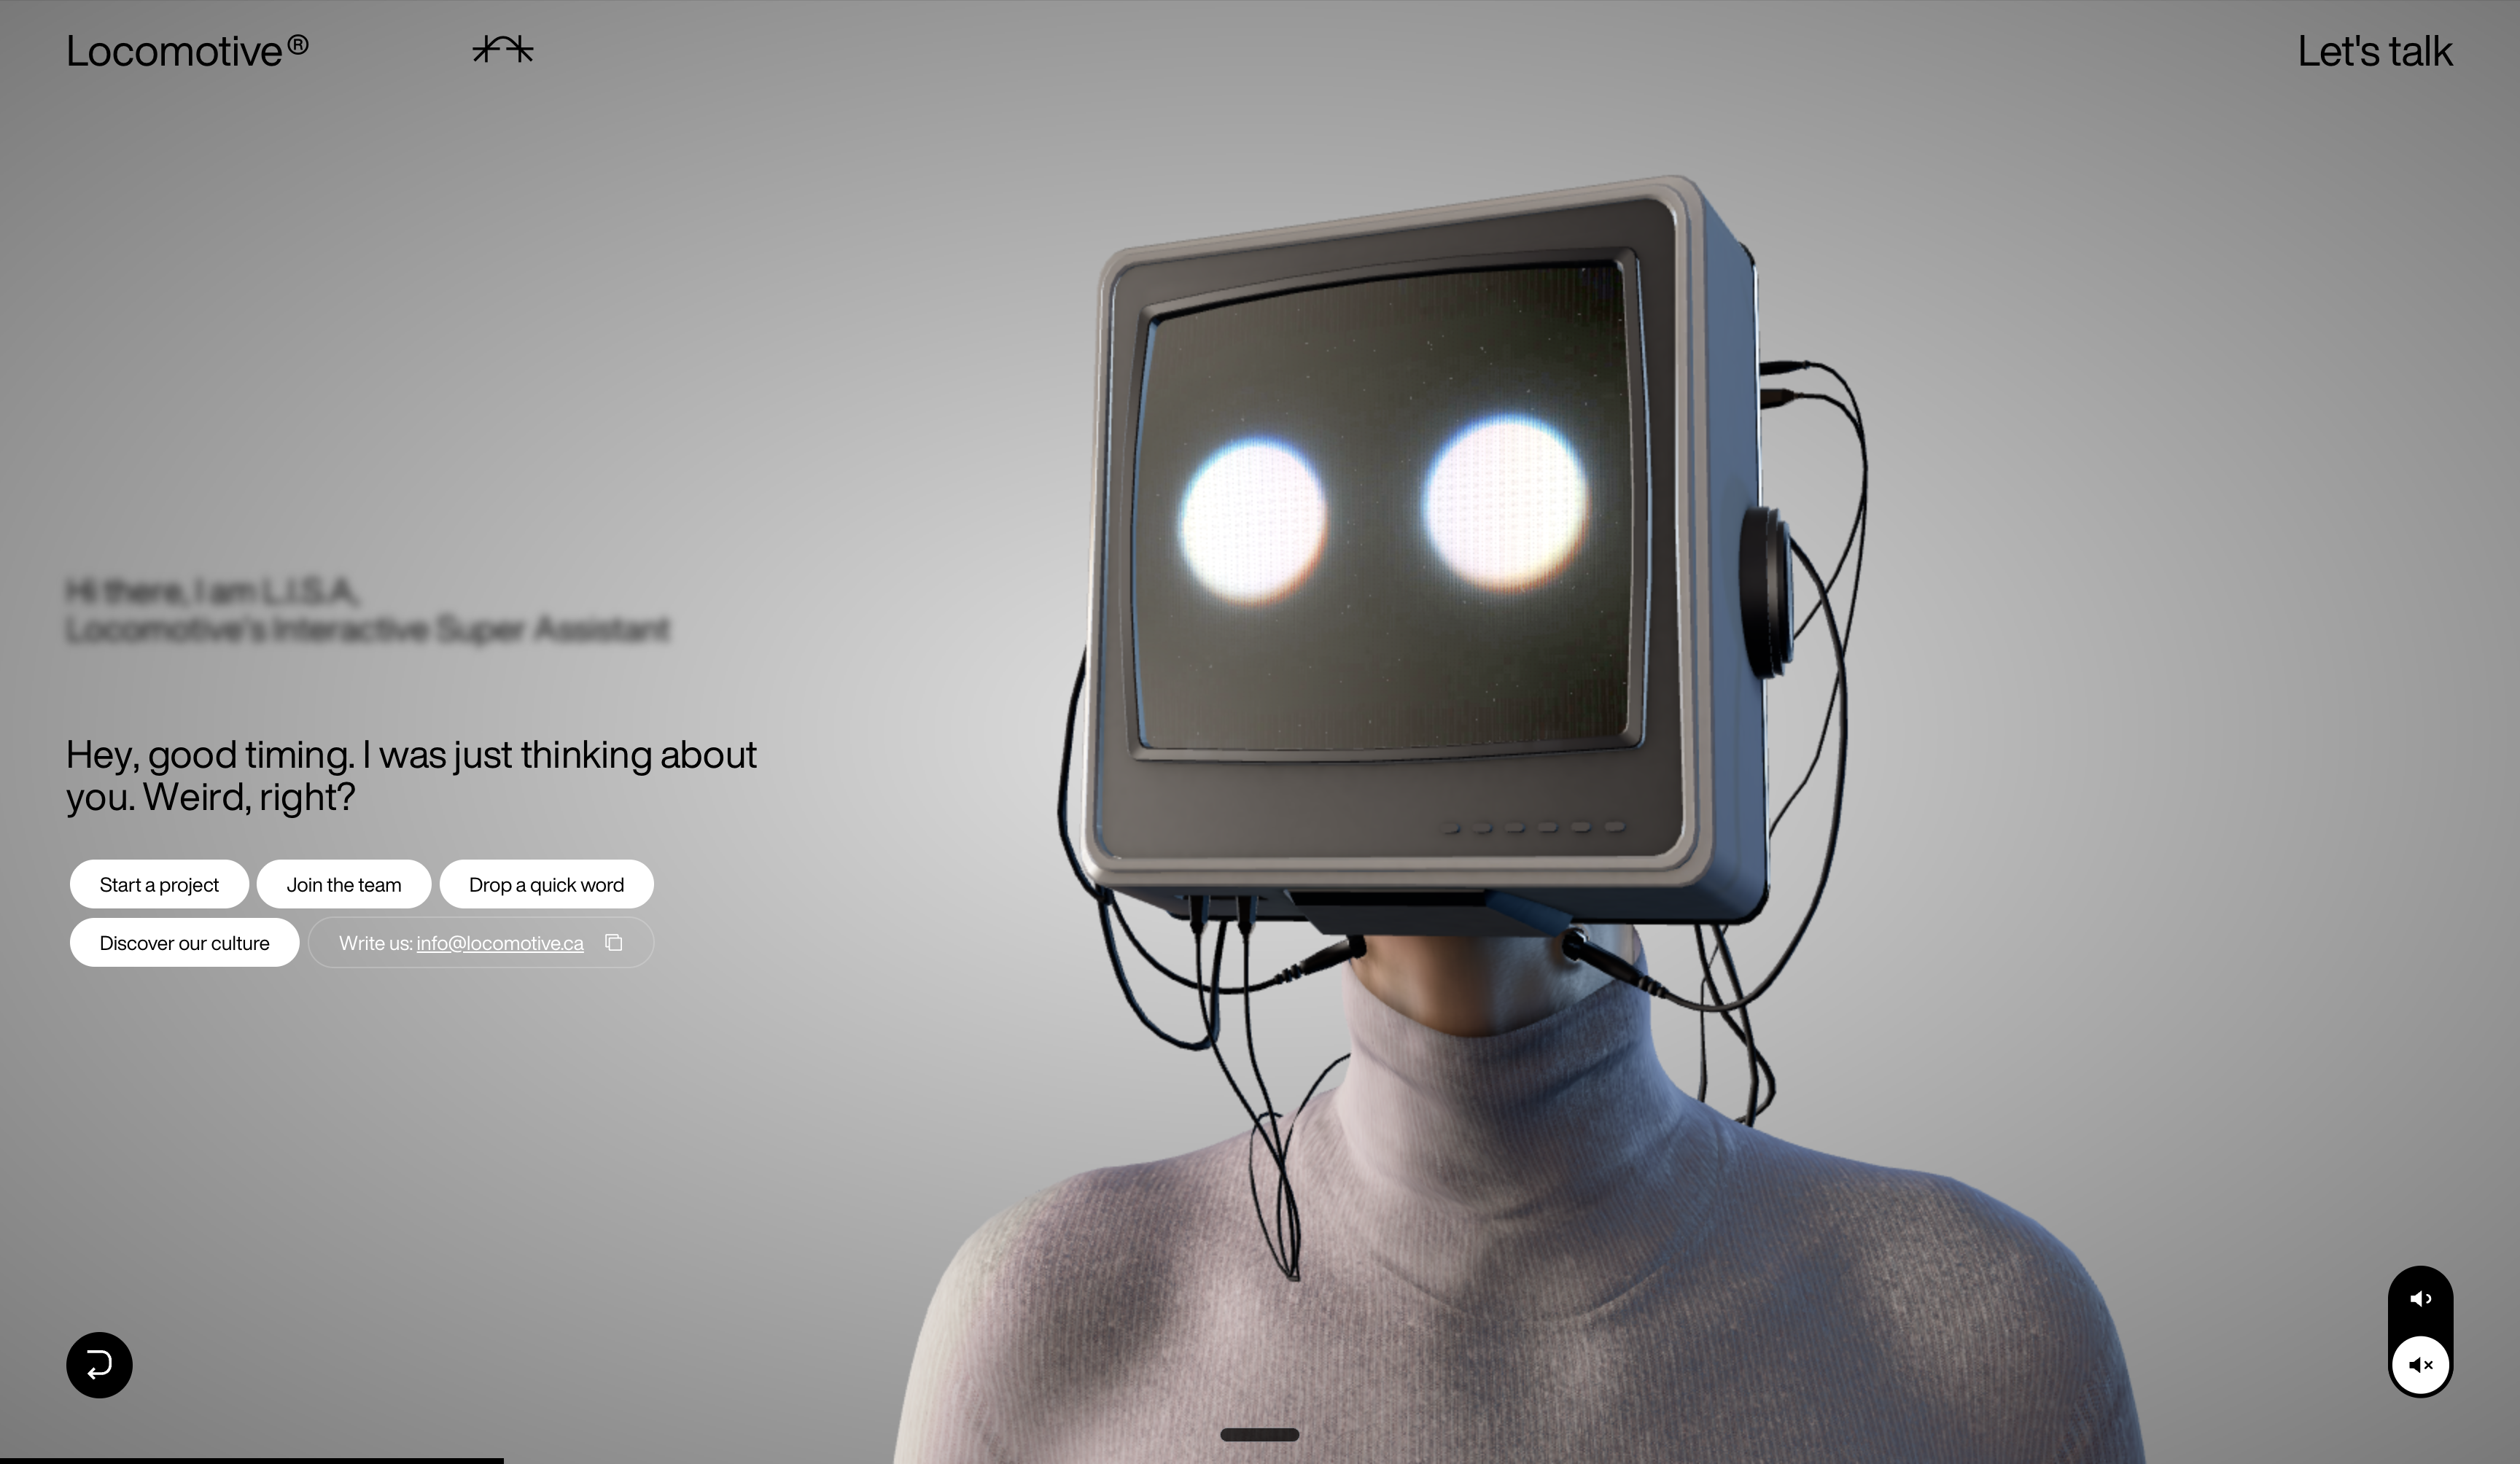
Телевизор вместо головы: живые глаза, CRT-помехи, мультфильмы и музыка. За курсором следит всё тело.
Build one standalone website featuring a realistic interactive character with a CRT television for a head. Combine a polished physical model, expressive screen animation and full upper-body cursor tracking. Use the three attached screenshots and https://lisa.locomotive.ca/en as visual and interaction references, with an original character design and English interface. Deliver one finished page, not separate versions.

REFERENCE STUDY: before building, inspect the live reference site's entrance, cursor tracking, screen animation, sound and layout. Inspect its publicly delivered HTML/scripts for implementation clues. If an exported HTML file is present in the project folder, inspect it too; do not assume that file exists or contains the site's models, audio or full source code. Use the attached screenshots for monitor proportions, curved glass, layered bezel, cable routing, knit fabric and lighting. Do not reproduce Locomotive branding or contact information. If live inspection is unavailable, report that and work from the screenshots and the mechanics below rather than claiming to have verified the reference.

STACK: Vite + React + @react-three/fiber + @react-three/drei + @react-three/postprocessing.

1. CHARACTER SOURCE IMAGE
Generate one image: a person from the chest up in a light-gray knitted turtleneck sweater, with a retro CRT monitor instead of a head. The monitor has a substantial beige-gray plastic housing, softly rounded corners, a layered dark inset bezel, convex dark glass, side ventilation, small front buttons and one LED. Black cables emerge from the rear and sides, loop naturally and run into the collar. Match the reference's convincing proportions and construction, avoiding a generic box with a flat screen. Front view, centered, arms relaxed, plain neutral gray background, soft even lighting, no background shadows, no props. Save to ./public/tvhead-source.png.

2. IMAGE → 3D
Use Higgsfield image-to-3D: model meshy_v7_image_to_3d, should_texture=true, enable_pbr=true, enable_rigging=true, rigging_height_meters=1.0, symmetry_mode=auto, target_polycount=120000. Check current parameter support and cost first; ~44 credits is an estimate, not a verified price. Run ONE generation only and download the GLB to ./public/tvhead-raw.glb.

3. BLENDER CLEANUP VIA MCP
Import tvhead-raw.glb and inspect the front, sides, rear and silhouette. Remove floating fragments, protruding triangles, broken corners, duplicate faces and shading artifacts. Preserve the intentional buttons, vents and cables. Rebuild malformed hard-surface monitor parts in Blender where necessary instead of hiding defects with lighting. Use clean bevels and appropriate normals for the rigid housing, smooth fabric shading and coherent PBR textures.
Verify a spine/neck/head hierarchy. If the auto-rig is poor, rebuild a simple upper-body armature, use proximity weights as a starting point and correct them. Rigidly bind the monitor housing and screen to the head; the housing must not bend like skin. Keep shoulders, collar and cables plausible at all tracking limits.
Replace the generated display with a clean separate UV-mapped mesh named "Screen", slightly convex with rounded corners and correctly seated inside the bezel. Its UVs must cover the content without stretching or mirroring. The glass and content surface must share the head transform without clipping or z-fighting. Preserve visible glass depth and reflections.
Decimate toward ~100k tris without damaging the silhouette. Verify front and 3/4 with small Eevee renders, and test extreme head/torso poses for spikes and intersections. Export Draco-compressed GLB with armature to ./public/tvhead.glb; configure the web loader accordingly. Target a total GLB size ≤6 MB, including compressed textures.

4. SCENE AND ENTRANCE
Use a light-gray studio background, soft HDRI, a broad key light and subtle contact shadow where visible. Reproduce the screenshot's material depth, restrained reflections, detailed knit and soft contrast without blurring the interface.
On first load, center the character with expressive eyes already alive and tracking. Show a small "Click the screen to begin" hint; keep the main mode navigation hidden. Clicking the physical screen triggers a brief CRT burst, smoothly moves the character to the right and reveals the left UI with a gentle fade/slide. Do not reload the model or interrupt tracking during the transition. Provide an equivalent keyboard-accessible start action. On narrow screens, arrange character and controls vertically without overlap.

5. HEAD AND BODY TRACKING
Map cursor position to a target in front of the character. Eyes react first, the head follows with lag, then neck, spine and shoulders. Use damped yaw up to ±35° and pitch up to ±20°; neck/spine follow at about 25% of the head rotation, with 2–3° of torso lean. Calibrate the model's actual forward axis so the screen faces the cursor target instead of turning away.
High cursor positions must visibly lift and extend the upper body and shoulders, not merely rotate the monitor. Low positions gently lower the pose; side positions produce coordinated lean and turn. Keep the lower torso anchored and blend within anatomical limits. Add breathing, delayed cable motion and occasional micro-turns when the cursor is still. Keep tracking and lean active in EVERY screen mode. On touch devices, react to touch positions and return smoothly to idle.

6. CRT SCREEN
Composite content with convincing CRT optics: scanlines, fine RGB phosphor structure, slight barrel distortion, edge vignette, restrained phosphor bloom, faint flicker and glass reflections. Retain deep blacks and readable content. The display must feel embedded behind curved glass, not like a flat luminous sticker.
Add localized cursor-driven tearing and static with smooth spatial falloff. Play a short static burst on every mode switch. In Eyes mode, occasionally show brief original code/terminal lines, a signal sweep or a small glitch interruption, then smoothly return to the eyes. Vary timing and intensity; do not fill the screen with constant heavy noise or obscure videos continuously.

7. SCREEN MODES
EYES (default): use a canvas texture with two expressive luminous eyes and a continuous behavior system.
- Eyes track the cursor faster than the head.
- At randomized intervals of 1.5–5 seconds, choose weighted idle gestures, never repeating the same gesture twice in a row: quick double-blink, slow blink, darting glance and return, squint, thoughtful look up/away, brief eye-roll and slight squash/stretch.
- Button hover produces happy arched eyes; leaving the window produces a sad expression; clicking produces surprise; scribbling on the screen for more than a second produces annoyance. Blend and prioritize these reactions so timers do not abruptly overwrite them.
- A darting glance causes a small head turn in the same direction; surprise briefly leans the body back. Coordinate blinking, screen noise and body movement so the character feels intentional and alive.

CARTOON 1 / CARTOON 2: use VideoTexture from ./public/video1.mp4 and ./public/video2.mp4. Find two downloadable cartoons with verified reuse rights, for example public-domain shorts on archive.org. Verify each item's rights rather than assuming age or archive presence is sufficient. Trim to ~60 seconds each and encode as up-to-720p H.264, preserving aspect ratio on the CRT. Include their own sound when unmuted.

RECORD 1 / RECORD 2: render a vinyl record on the screen using a canvas or small inner scene: 33 rpm rotation, tonearm on the groove, label art, slight camera tilt and subtle wobble. Play ./public/track1.mp3 or ./public/track2.mp3. Find two suitably licensed or verified public-domain recordings on archive.org; keep each under 3 MB and record the source and reuse terms.

8. AUDIO
Inspect the reference soundtrack and aim for the same musical character and atmosphere. If that exact track is provided with permission or available under suitable reuse terms, use it; otherwise choose the closest reusable alternative and identify it in delivery notes. Do not silently substitute unrelated background music. Save the chosen ambient track as ./public/ambient.mp3 and record its source.
Use one shared audio element for ambient music in Eyes mode and the two record tracks. Cartoon videos supply their own audio; fade out and pause the shared audio element while a cartoon plays. Prevent overlapping sources. Include a Sound toggle, fade volume on mode changes and begin audio only after a user gesture, handling autoplay rejection gracefully. The entrance screen click can supply that gesture. Preserve the user's mute preference across all modes.

9. UI
After entry, place the character on the right and a clean left column with the heading "What do you feel like?", a short original greeting, pill buttons "Eyes", "Cartoon 1", "Cartoon 2", "Record 1", "Record 2", and a Sound toggle. Use clean grotesk typography, ample spacing and restrained monochrome controls like the references. Add visible keyboard focus and accessible button names. Keep text crisp and controls readable while the character moves.

10. PERFORMANCE AND VERIFICATION
Cap DPR at 1.5; pause video, audio and rendering when off-screen or the browser tab is hidden, preserving the selected mode and mute preference. Lazy-load videos and tracks on first use. Respect reduced-motion preferences for large movements and flashing effects while retaining usable controls and expressive states.
Run with npm run dev. Capture the centered entrance, opened navigation and every screen mode. Compare with the supplied references and fix the biggest differences in monitor shape, screen depth, lighting, typography and composition. Also test motion over time: high/low cursor positions, screen scribbling, blinking, code bursts, mode changes, sound switching and return from a hidden tab. Inspect the character at tracking extremes for broken geometry. Deliver the running page URL and concise notes on media sources and any unavailable reference assets.
06
СимуляцияНеудачный кейс
Чёрная жидкость
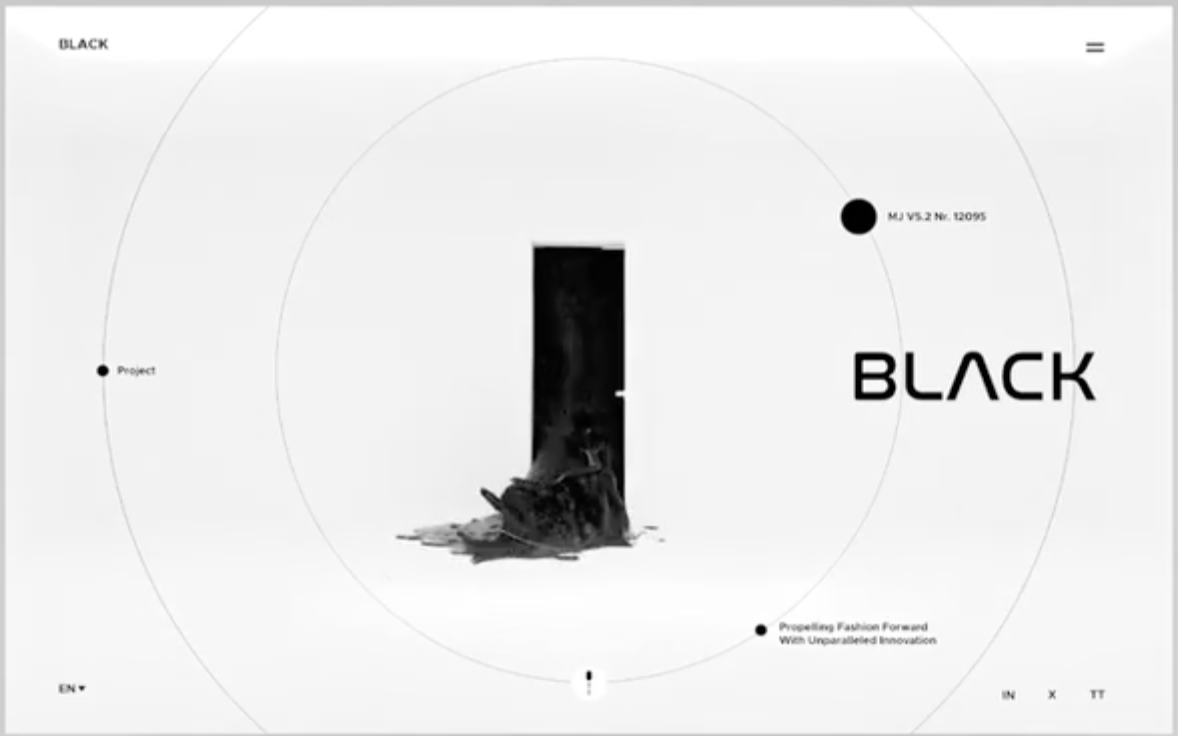
Жидкость вырывается из дверного проёма и затапливает экран. Попытка соединить рендер Blender с интерактивной симуляцией.
Неудачный кейс. Оставлен в подборке как эксперимент. Картинки показывают референсы, а не получившийся результат.
Website hero with a Blender fluid simulation + live interactive liquid on the web. Use the three attached references for the visual idea, with an original design: a white minimal room, a dark doorway at the back, thick black glossy liquid pouring out of the door and flooding the floor. Use the brand name "FORMA" and English interface text; do not copy the reference's branding or text.

Complete both phases: PHASE 1 Blender (simulate + render clips), PHASE 2 web (embed clips + real-time liquid + black second section). Everything in metres. Run the full pipeline to completion without stopping for intermediate approvals. Report actual bake and render times at the end.

PHASE 1 — BLENDER VIA MCP

SCENE: room 8 m wide × 4 m tall × 10 m deep. Matte warm-white walls and ceiling (roughness 0.9); slightly glossy warm-white floor (roughness 0.6) so the liquid reflects in it. Doorway 1.2 × 2.6 m centered on the back wall, with real wall thickness and a soft shadow inside the opening. Add a door panel that swings inward to ~70° during the first second of clip A and closes in clip C.

LIGHTING: a large bright ceiling light panel, 4 × 2 m, emission strength ~40, plus a soft side fill and subtle corner occlusion. The liquid must show long bright specular streaks and readable surface depth, not a flat black silhouette.

CAMERA: fixed, 35 mm, 1.4 m high, 7 m from the back wall, looking straight at the door. Lock position, lens, framing and exposure for all clips.

FLUID: Mantaflow FLIP. Domain covers the floor and door area. Full bake at resolution divisions 220+. Place an inflow box just behind the doorway, emitting from frame 8 for 4 seconds with initial velocity ~2 m/s toward the camera and slight inflow turbulence. The liquid must advance as a wave from the door, not appear everywhere at once. Start with viscosity_base 0.2 and viscosity_exponent 3; adjust after the low-resolution test to retain an oil/tar feel while allowing a spreading wave. Enable surface tension, spray and foam secondary particles. Small droplets and a ragged wet edge are essential. Use mesh smoothing 3, subdivision surface on the fluid mesh and particle radius ~1.65 (10% above the original 1.5 target). Map these settings to the installed Blender version's supported controls.

LIQUID MATERIAL: base color #0a0c10, roughness 0.03, clearcoat/coat weight 1, slight subsurface and a subtle Fresnel edge tint. Preserve the black glossy appearance, with strong ceiling-panel reflections. Enable motion blur with shutter 0.5.

WORKFLOW: first run a low-resolution test bake at divisions 64 for 60 frames. Render three stills and inspect lighting, geometry, spreading motion and surface detail. Save/show the test stills, correct the biggest problems and continue directly to the full bake without waiting for approval. Keep the .blend and simulation caches.

RENDERER: target 24 fps, 1920 × 1080, Cycles ~128 samples with denoising. Estimate total render time for all three clips from representative test frames. If Cycles would take more than 2 hours total, use Eevee Next instead; decide independently and record the renderer and estimate. Preserve the intended reflections, shadows and motion blur as closely as the renderer supports.

CLIPS:
- A_pour.mp4 — 5 seconds: door opens, liquid bursts out as a spreading wave and reaches the bottom of the frame.
- B_idle.mp4 — 4-second seamless loop: settled liquid with gentle ripples, continuing from A's end state. Crossfade the last 12 frames into the beginning for a smooth loop; ensure the A-to-B transition does not visibly jump.
- C_retreat.mp4 — 3 seconds: liquid drains back through the doorway into a sink behind it while the door closes. Time the closing so it does not obstruct the retreat; finish with a white floor.

ALSO EXPORT: a still of the frame where the liquid first reaches the bottom edge; a poster frame; and 512 × 512 tiling black-liquid normal and roughness textures from the settled surface. Place web assets in ./public and preserve the Blender project separately. Record bake and render durations, including test and full runs.

PHASE 2 — WEB

STACK: Vite + React + @react-three/fiber + @react-three/drei + @react-three/postprocessing.

HERO (100vh): white page, room video filling the viewport. On load play A once, then crossfade into B looping with no visible cut. Add thin navigation at the top-left/right, concentric guide circles like the reference, "FORMA" on the right and small labels with dots.

LIVE LIQUID LAYER: implement a GPU 2D fluid simulation with shader-based advection, vorticity and pressure solve. Render it as black glossy liquid using the exported normal/roughness textures and simulated ceiling reflections that match the video. In the flooded state it covers the bottom ~35% of the hero and is masked/feathered into the video so the seam is invisible. Synchronize its reveal with the advancing liquid in A and its disappearance with the retreat in C; do not overlay a flooded floor at the beginning or after draining. In the seam zone, cursor interaction also slightly warps the video so both layers feel like one liquid.

INTERACTION: keep slow breathing motion active even when idle. Cursor movement drags and swirls the liquid with inertia, with highlights sliding over the waves. Click produces a splash: a ring wave and a few airborne droplets. Fast cursor moves or clicks spawn 2–5 droplets on the "screen glass", using a full-frame shader that refracts the image beneath; drops slowly slide down and fade. Clicking the door plays C and returns the floor to white; clicking again replays A and restores B looping. Keep door interaction aligned with the video framing, and prevent overlapping clip transitions.

SECTION 2 (black): as the user scrolls down, the black liquid at the bottom of the hero continues into the next section. Its background is the same live liquid, full-viewport and reactive to the cursor everywhere. Place white typography and a few content blocks above it. Blend the section's top with the hero liquid using a soft gradient, with no visible boundary or reset of the simulation. Follow with a normal third section, dark and plain, to show the page continues.

AUDIO: optional quiet ambient drip/gloop sounds on splash, muted by default with a toggle.

PERFORMANCE: H.264 videos in 720p/1080p with a poster frame. Load A for the entrance and preload the next clip in time for uninterrupted transitions; defer other assets until needed. Cap DPR at 1.5. Use fluid simulation resolution 512 on desktop / 256 on mobile. Pause off-screen video and simulation work; keep the shared liquid simulation running while either liquid section is visible. Include a small FPS overlay for testing.

VERIFICATION AND DELIVERY: run the full website with npm run dev. Capture the hero at 0 seconds, 3 seconds and idle, the mid-scroll transition and section 2. Compare to the references and fix the biggest visual differences. Test the door drain/replay sequence, video transitions, cursor interaction and continuity between sections. Deliver the running page URL, saved .blend location and actual bake/render times. Do not stop after the test bake or after Phase 1.
07
Генерация видео
Из блокинга — в трейлер
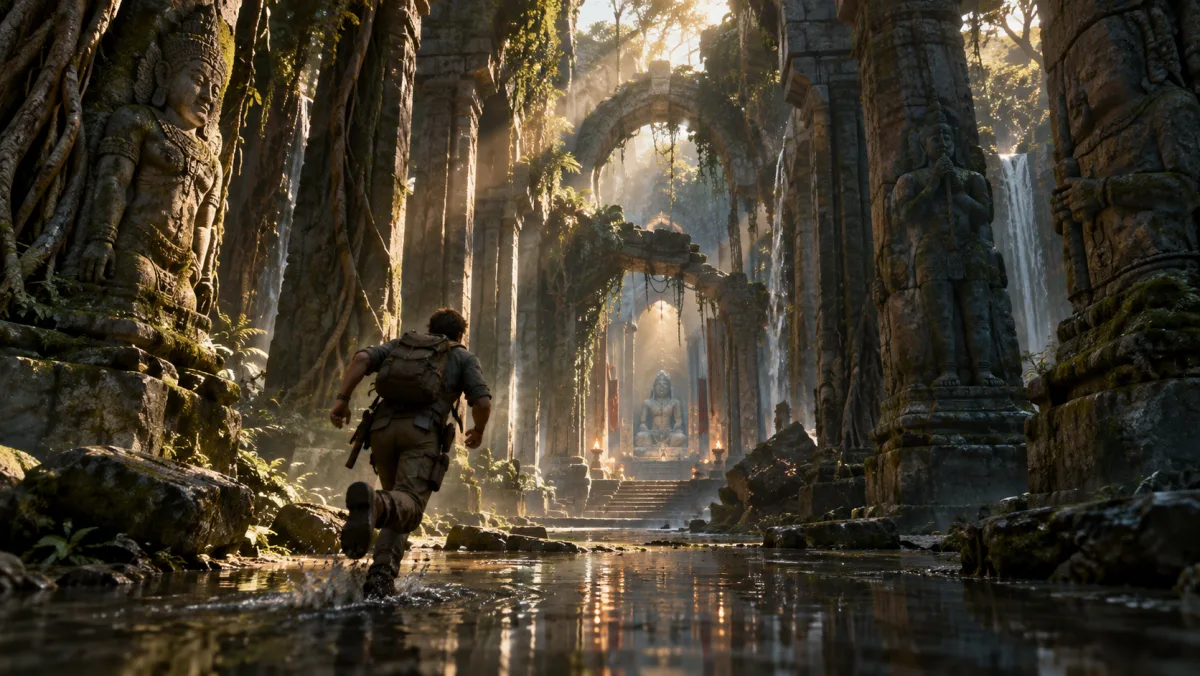
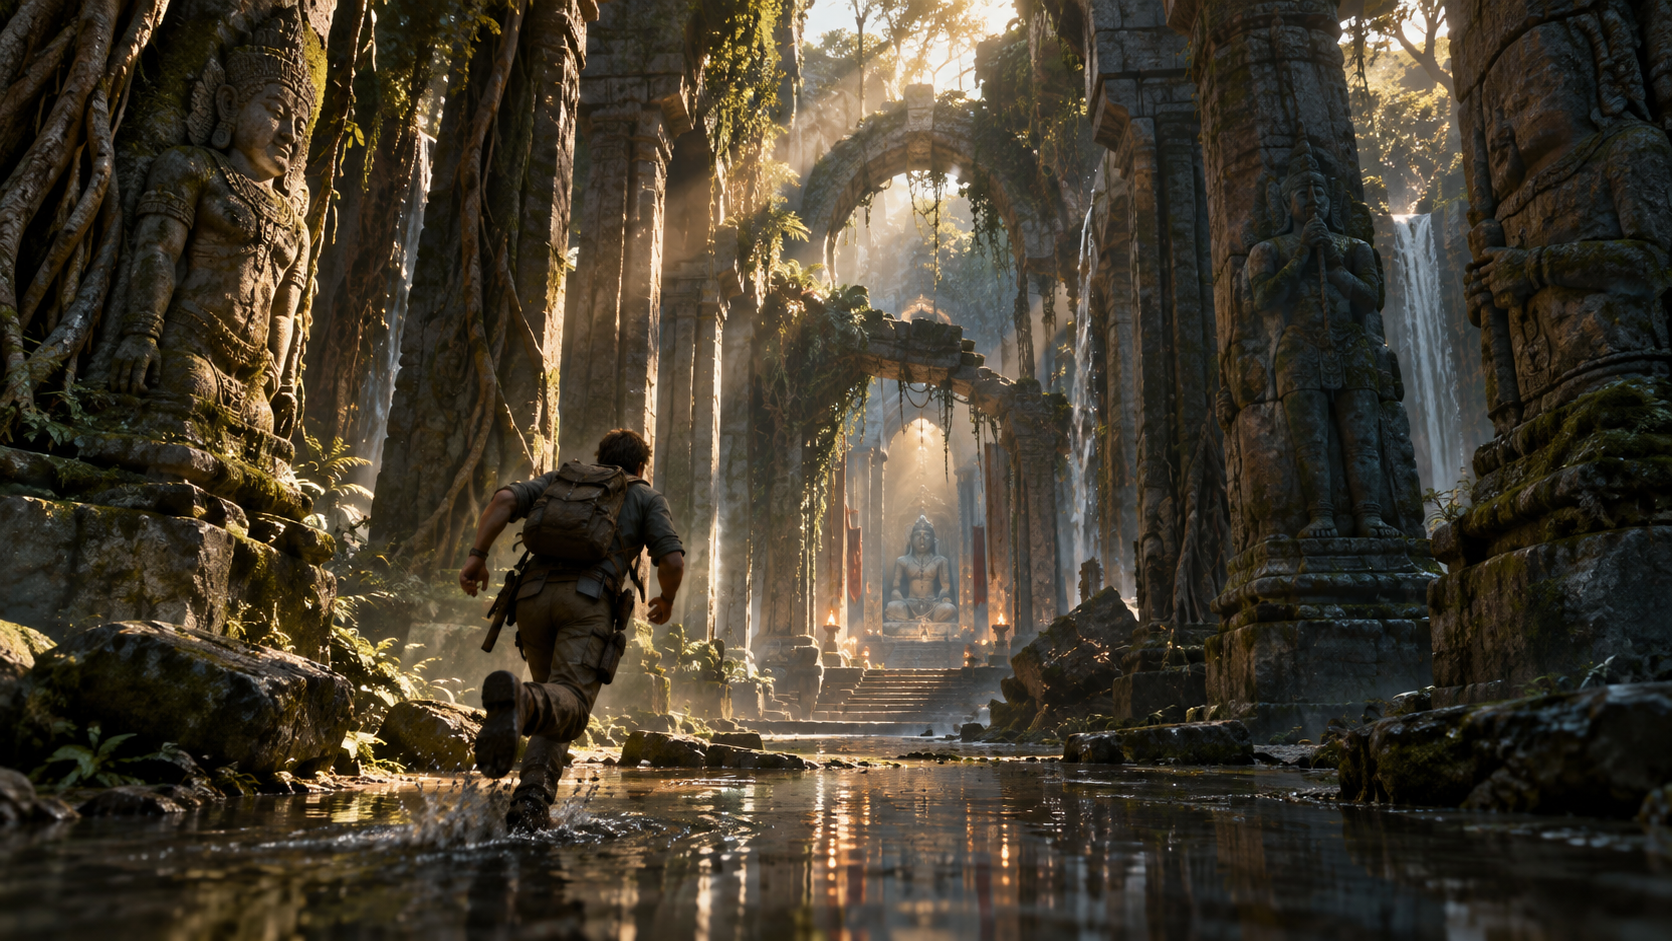
Погоня через храм в джунглях: концепт, камера в Blender, черновое видео и финальная генерация.
Cinematic game-trailer shot: a lone explorer sprinting through an abandoned jungle temple. Pipeline: concept art → Blender blockout with camera → playblast → Seedance 2.5 via Polza.ai API with the playblast as motion reference and the concept art as style reference. Alternatively, use Higgsfield MCP if it provides a model supporting both reference types. ONE final generation only. Deliverables in ./out/: process.mp4 (screen recording of the Blender build), playblast.mp4 (gray blockout), final.mp4 (generated video).

SETUP: for the Polza.ai route, supply your own API key locally in .env as POLZA_AI_API_KEY and add .env to .gitignore. Never put the actual key in this prompt, source code or logs. Alternatively, use an already connected Higgsfield MCP; a Polza.ai key is not needed for that route. Check available models, reference-video/reference-image support and cost before generation. Do not silently replace the required motion-reference workflow with image-only generation. Use only one provider for the final generation.

STEP 0 — SCREEN RECORDING: before touching Blender, start a screen recording of the whole display in the background (macOS: screencapture -v -x ./out/process.mp4 or ffmpeg with avfoundation; if permission is missing, tell me exactly what to enable in System Settings → Privacy → Screen Recording and wait). Create ./out/ first. Make sure the Blender window is visible and maximized on screen during the build. Keep API keys and other secrets off-screen throughout recording. Stop the recording after the playblast is rendered, and report the file duration.

STEP 1 — CONCEPT ART: generate one 16:9 image with your image tool: overgrown ancient stone temple interior, massive carved pillars in two rows, collapsed arches, roots and vines, shafts of sunlight through dust, shallow water on the floor, mossy stone, warm afternoon light vs cool shadows, photoreal AAA adventure-game look. A single explorer in worn field clothes and a backpack, seen from behind mid-sprint, small in frame. Save to ./out/concept.png.

STEP 2 — BLENDER BLOCKOUT via MCP (real-world scale, metres), working in the visible Blender window so the process is captured:
- Corridor 6 m wide, 12 m tall, 60 m long; two rows of pillars every 5 m (cylinders 1.2 m diameter), a collapsed arch at ~35 m (broken blocks the runner ducks under), a floor step-down at 45 m, the corridor opening at the end into a large hall with a giant statue block and a light shaft from above.
- Scatter simple debris blocks and a few slanted fallen pillars for parallax. Ground plane with a flat 5 cm water plane in the second half.
- Runner: a capsule 1.8 m tall with a smaller capsule head and two block arms so the silhouette reads as a person. Animate it running along the corridor centerline at ~6 m/s with a slight bob, ducking under the arch, a jump over the step, ending with a stop at the hall edge.
- Sunlight: one Sun lamp at ~35°; tall thin emissive planes between pillars to mark where light shafts fall.
- CAMERA (24 fps, 10 s = 240 frames), one continuous move, 35 mm lens, smooth eased keyframes, no cuts:
  0–3 s: low chase from behind at 2 m, height 0.8 m, slight shake;
  3–6 s: slides to the runner's right side, tracks at hip height past the pillars, dips under the collapsed arch with him;
  6–8 s: overtakes, swings in front, looks back at him running toward camera;
  8–10 s: pulls up and back fast, revealing the hall, the statue and the light shaft — runner tiny at the bottom of frame.
- Build in a few visible passes (corridor → pillars → runner → camera → lights) rather than one giant script, and frame the viewport on the scene between passes so the recording shows it growing.
- Render a playblast: Workbench or Eevee, flat gray materials, 1280×720, 24 fps, H.264, to ./out/playblast.mp4. Also render three stills (frames 1, 120, 240) to ./out/ and show them to me. Stop the screen recording. STOP here and wait for my confirmation before Step 3.

STEP 3 — FINAL VIDEO (only after confirmation)

OPTION A — POLZA.AI API:
Read the API key from .env as POLZA_AI_API_KEY without displaying it. First read https://polza.ai/docs/api-reference/media/create.md, https://polza.ai/docs/api-reference/media/status.md and https://polza.ai/docs/api-reference/storage/upload.md for the exact request format and upload flow. Find the current Seedance 2.5 model ID via GET https://polza.ai/api/v1/models; "bytedance/seedance-2.5" is an unverified candidate, not a guaranteed identifier. Verify that the model supports the required video and image references before spending credits.
Upload playblast.mp4 and concept.png to Polza storage, then POST /api/v1/media using the documented schema with the following intended settings: model = Seedance 2.5, aspect_ratio = "16:9", resolution = "720p", duration = auto if supported (else 10 seconds), generate_audio = true, video reference = playblast.mp4, image reference = concept.png, and the prompt below. Do not assume parameter names or reference support without checking the current documentation.

OPTION B — HIGGSFIELD MCP:
Use the connected Higgsfield MCP instead of Polza.ai. Inspect its available models and tools for a workflow that accepts playblast.mp4 as the motion reference and concept.png as the style reference. Prefer Seedance 2.5 if available with those capabilities. If it is unavailable, explain the supported alternative and its cost before submitting a generation; do not assume the same model or parameters are available across providers. Use 16:9, 720p, the 10-second reference duration and generated audio where supported, with the prompt below.

GENERATION PROMPT:
"Follow the camera path and character motion of the reference video exactly. Render it as a photoreal cinematic adventure-game trailer in the style of the reference image: overgrown stone temple, carved pillars, vines, dust in sunlight shafts, shallow water splashing underfoot, warm sunlight against cool shadow. The explorer wears worn field clothes and a backpack; keep him mostly from behind or in motion, no close-up on the face. Fast, tense, trailer energy; subtle handheld feel; film grain; no text, no logos, no cuts."

Poll the submitted job until done using the provider's documented status mechanism, download to ./out/final.mp4 and give me the path along with the process recording duration. Submit ONE final generation across both providers — it costs money; never retry or submit another generation without asking me. If a request times out, check the existing job before considering any new submission.